Using closed captioning
Caption any audio or video in VoiceThread, both slides and comments.
New VT
- Viewing captions and transcripts
- How to add a caption file to a slide or comment
- Requesting free captions
- Professional caption integration
- Automatic VoiceThread Captioning
- Editing captions
Viewing captions and trascripts
While viewing a VoiceThread, turn on closed captioning by clicking on the “CC” button in the bottom-right corner of the VoiceThread and selecting the language of the caption you want to view.
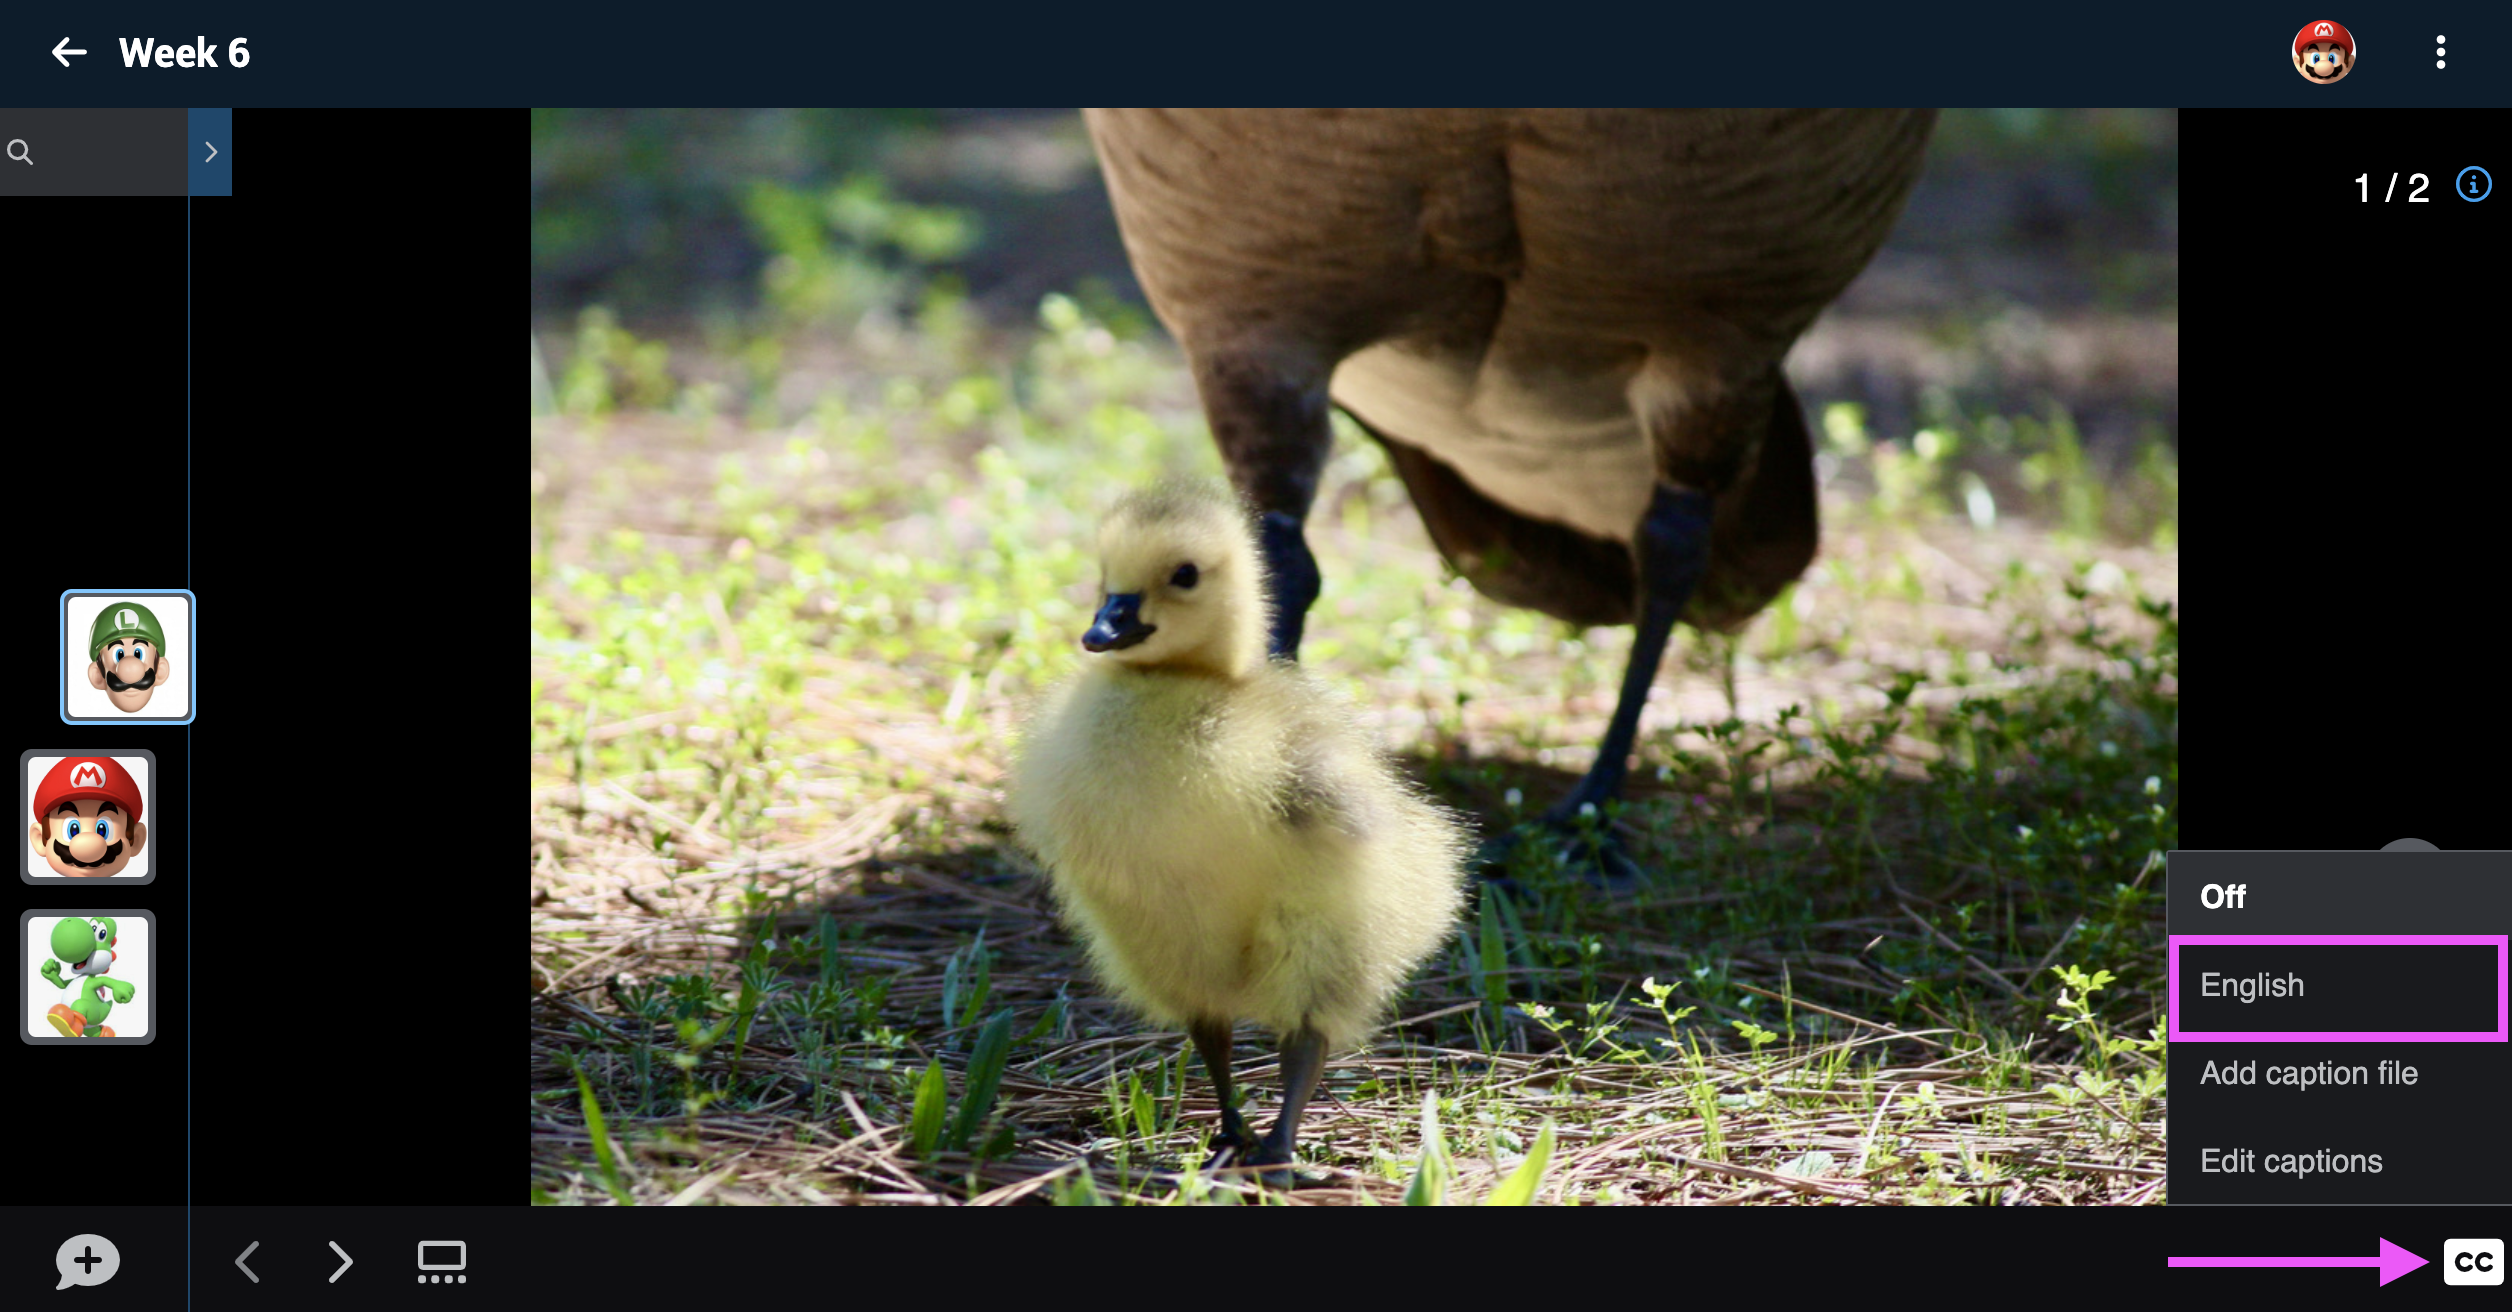
To find a transcript of a slide or comment, click on the “CC” button in the bottom-right corner of the VoiceThread for a slide and select “Edit Captions,” or inside the comment window for a comment. The transcript will display on the right side of the window.
How to add a caption file to a slide or comment
Only the person who created a VoiceThread or someone who has editing rights to that VoiceThread can add captions.
For central media slides:
- Navigate to the slide that contains the audio or video file.
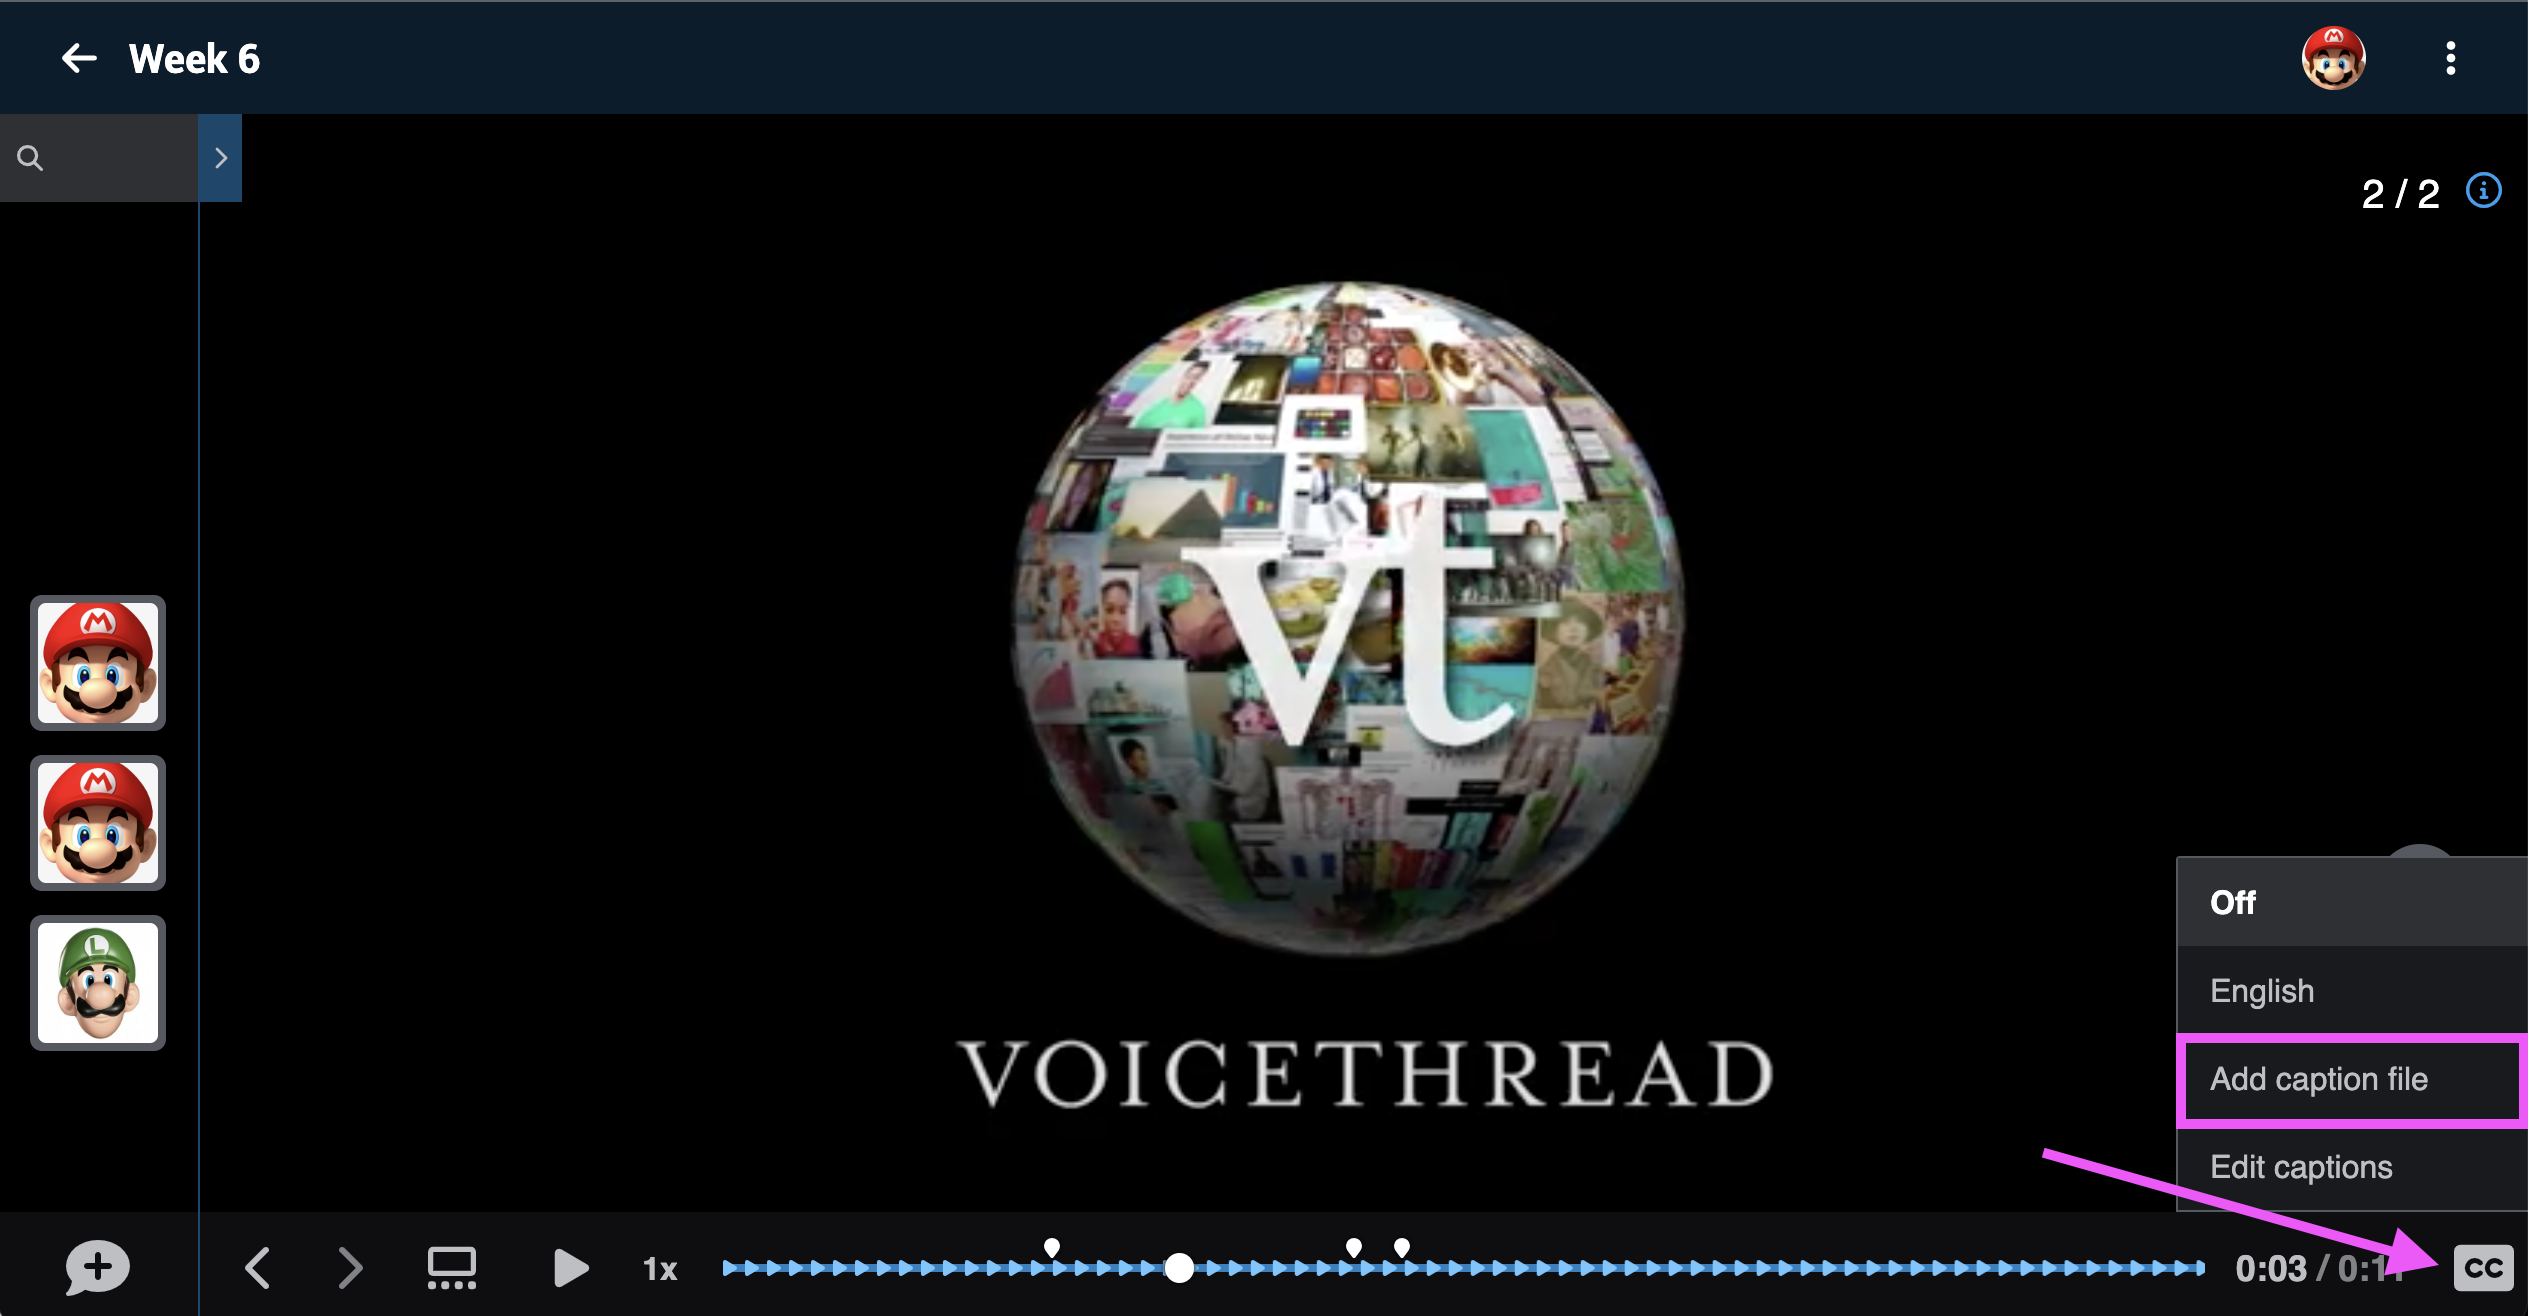
- Click on the “CC” button in the bottom-right corner of the VoiceThread.
- Select “Add caption file” from the menu.
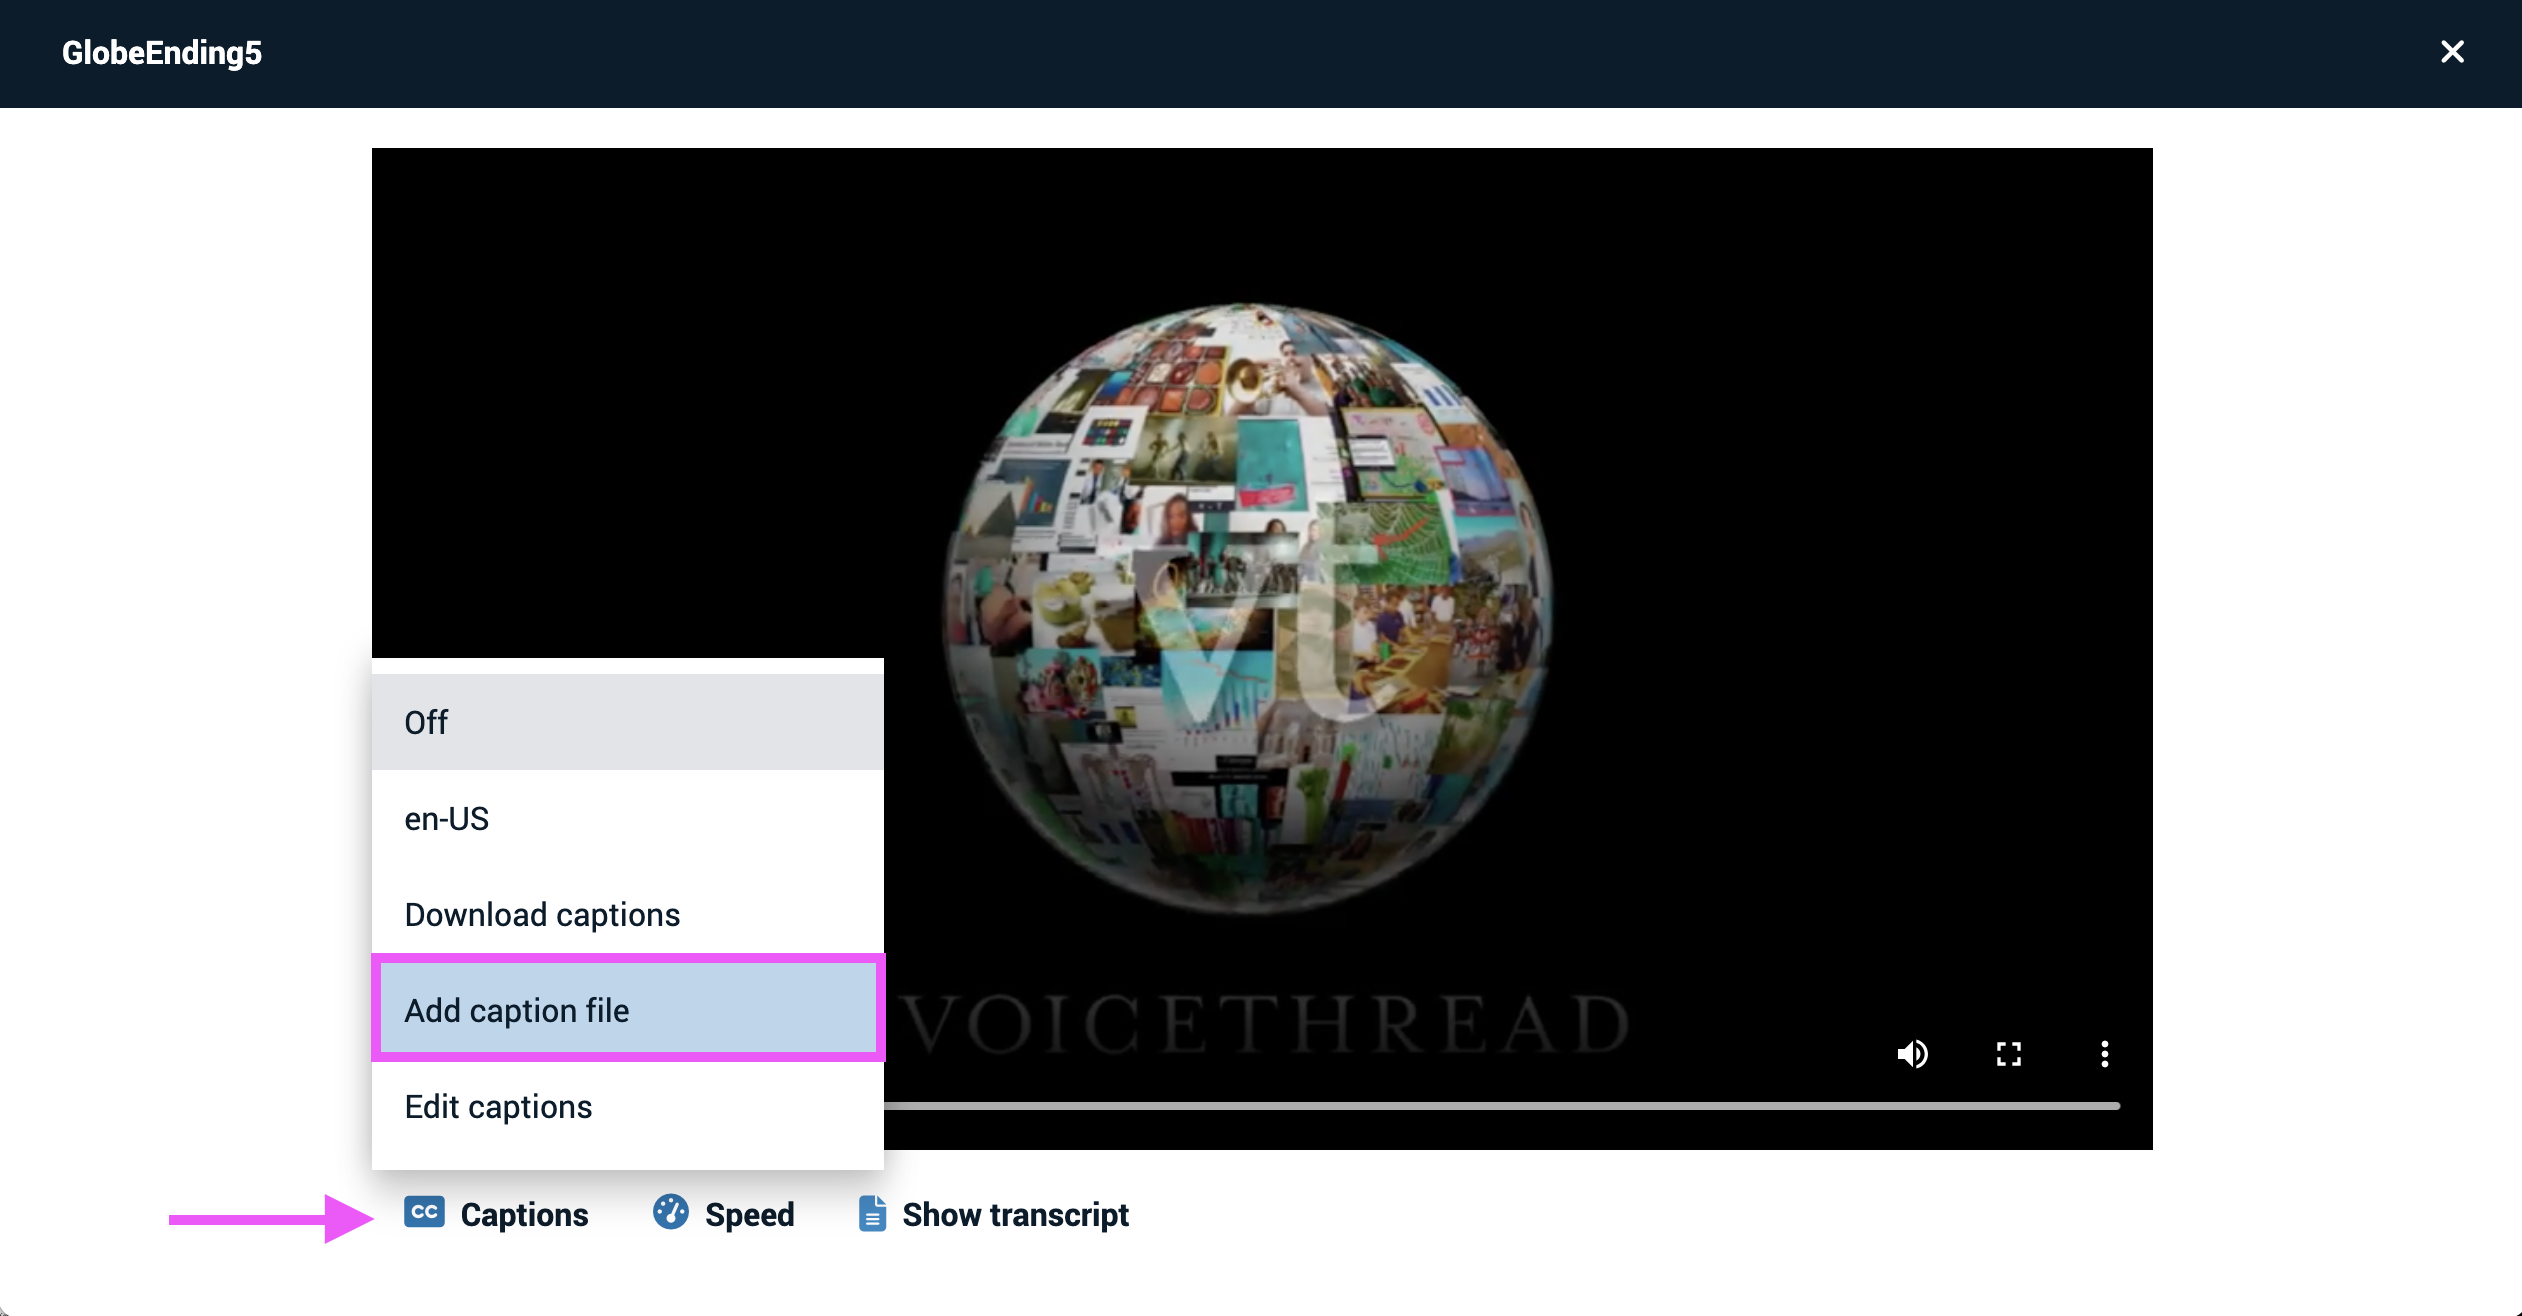
- Click “Captions” beneath the slide media, and select “Add caption file.”
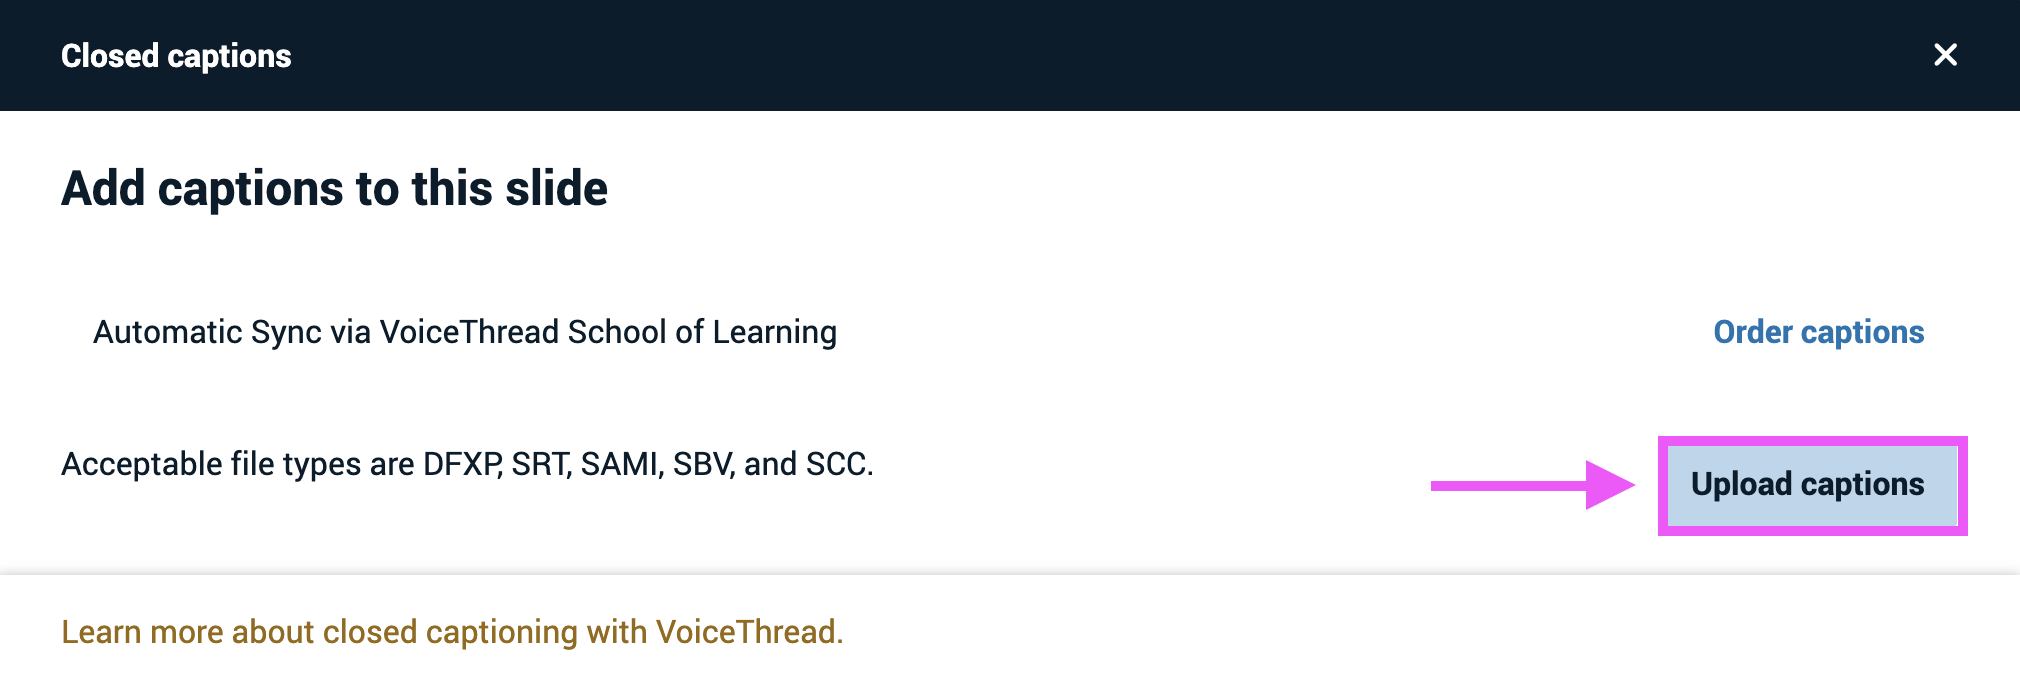
- Click “Upload captions,” and select the CC file you want to use.
- Close the caption window when you’re done.
For comments:
- Start playing the comment you want to caption.
- Click on the CC button near the bottom-right corner of the comment window.
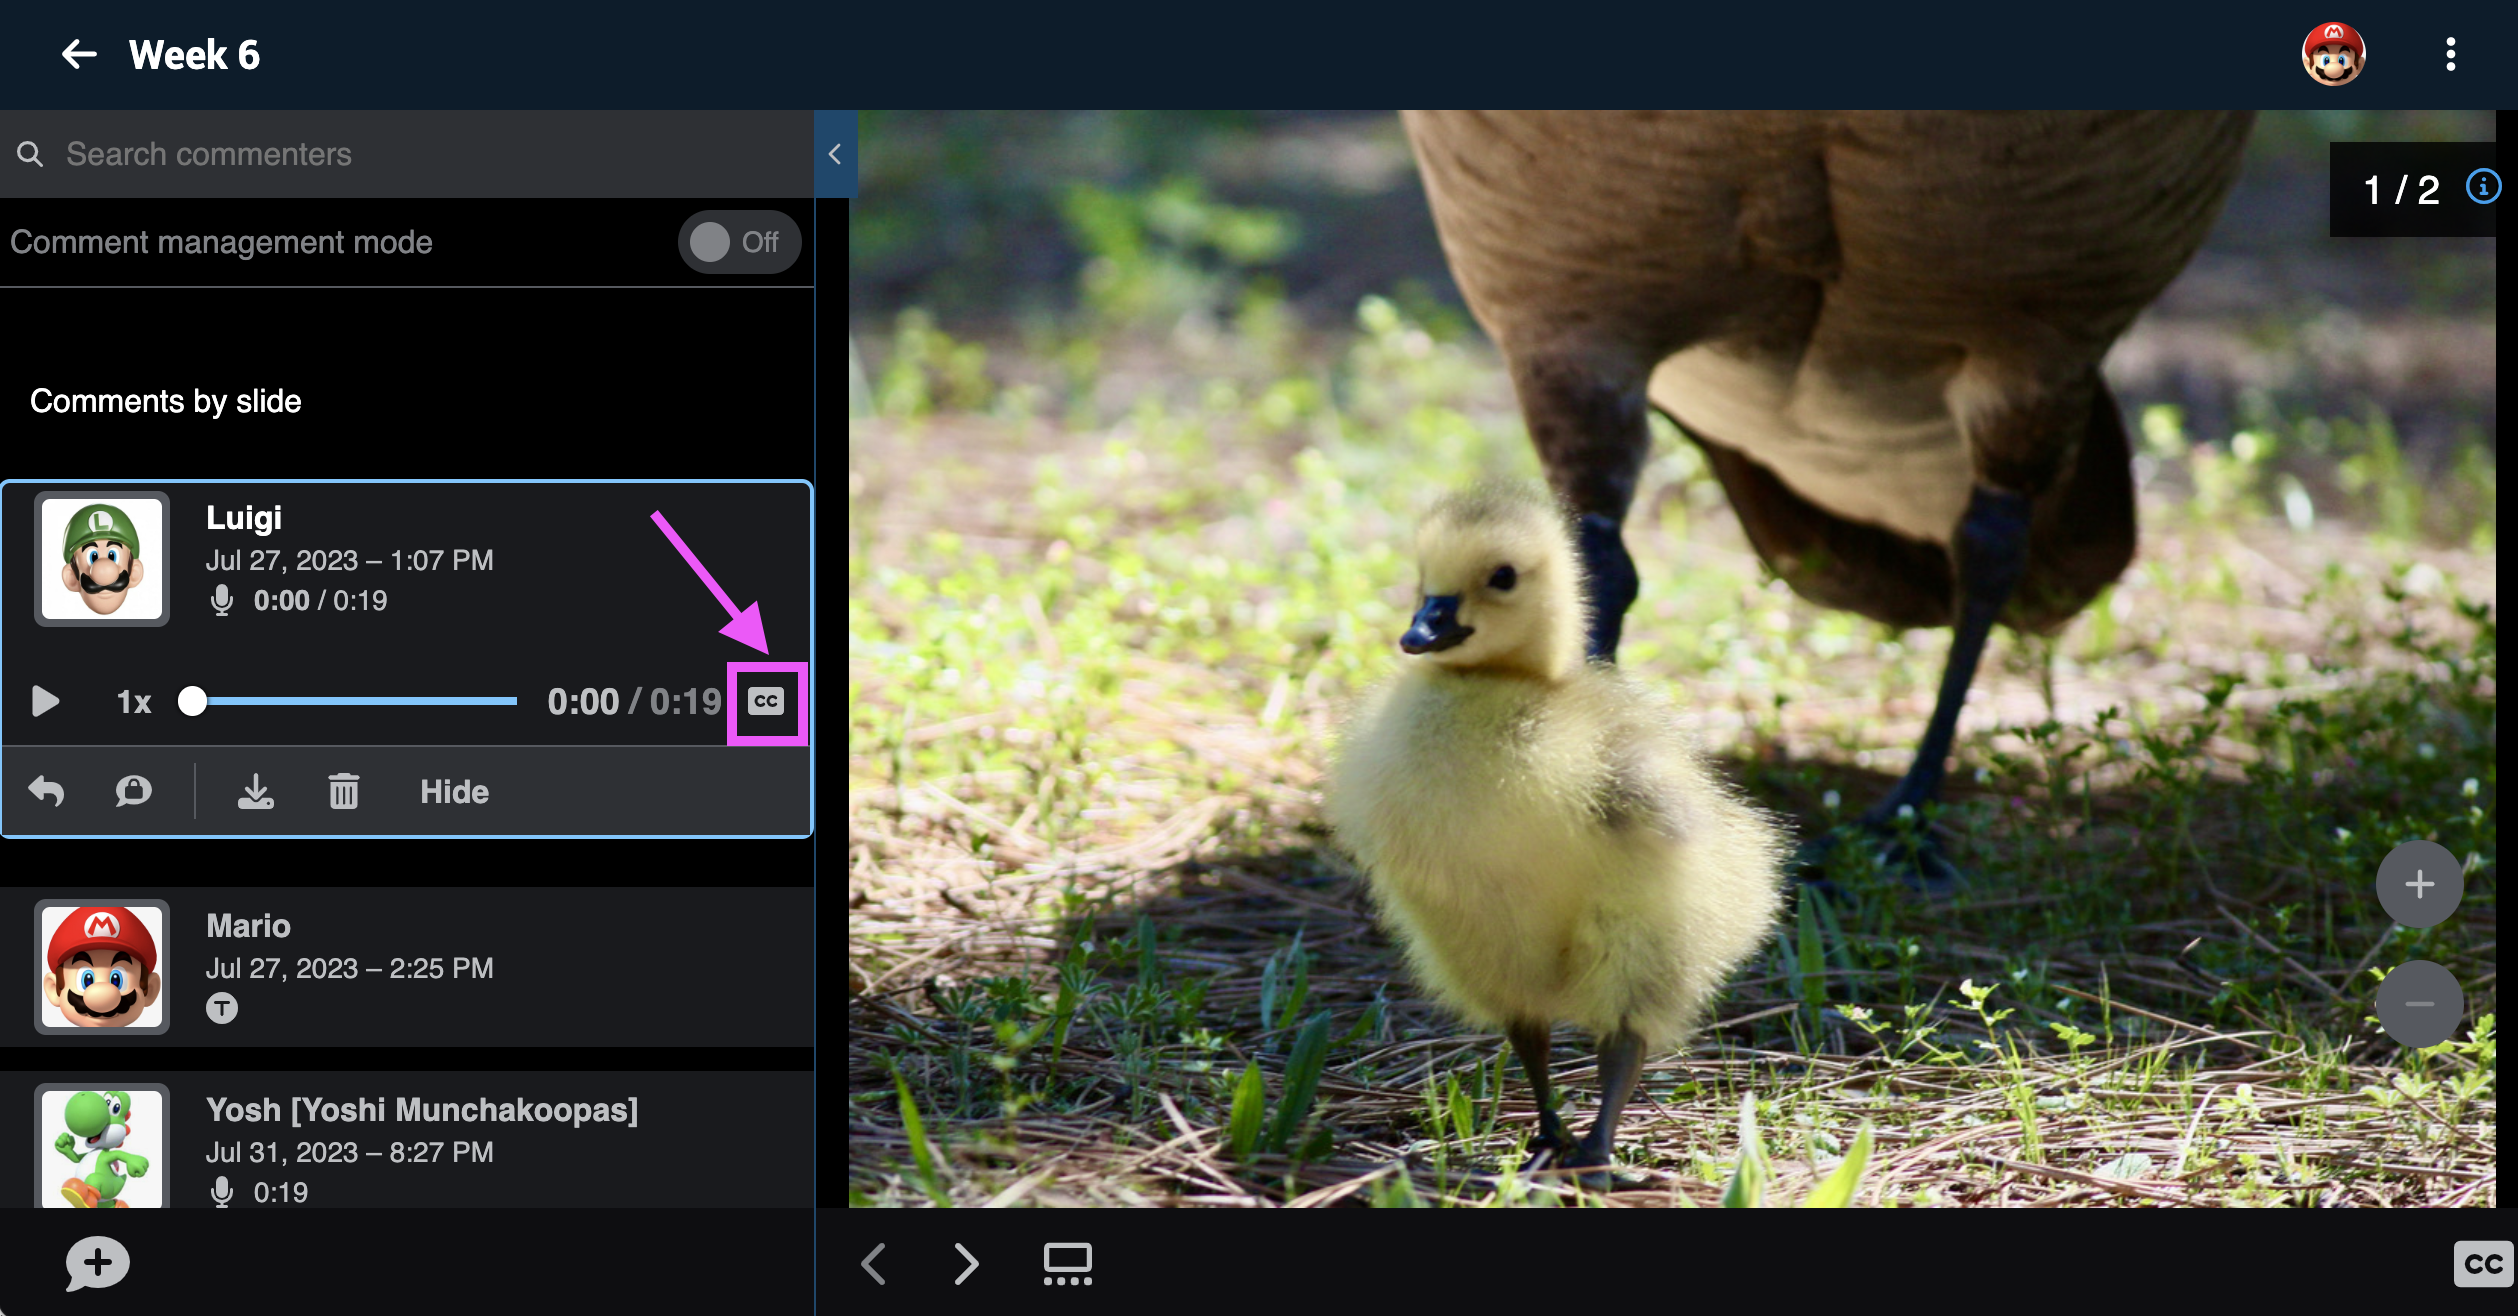
- Click “Captions” beneath the slide media, and select “Add caption file.”
- Click “Upload captions,” and select the CC file you want to use.
- Close the caption window when you’re done.
VoiceThread accepts caption files in these formats:
- DFXP
- SRT
- SAMI
- SCC
- SBV
Requesting free captions
VoiceThread currently offers machine-generated captions at no cost. To request free machine captions, use the steps above to add a caption, but choose “Order captions” next to the option labeled “Machine captions from VoiceThread” option instead of uploading a file.
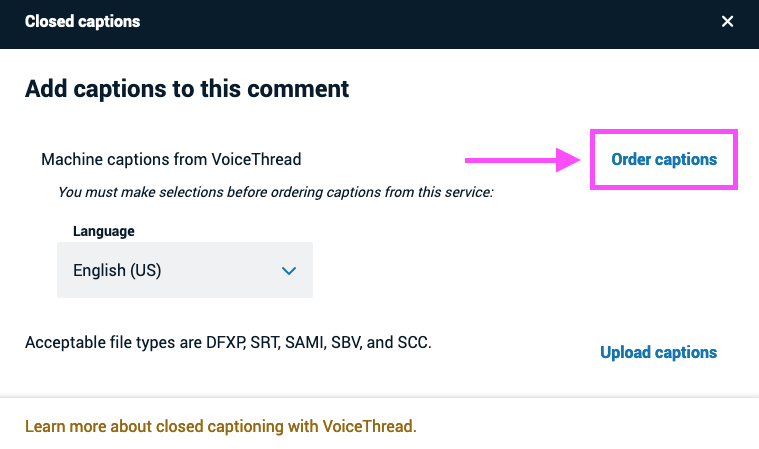
There is a 4-day turnaround time, and you will receive an email notification as soon as the caption is ready to be viewed. This option will be guaranteed free through December 31, 2023, and we will evaluate whether we can continue to keep it free at that time.
Professional caption integration
If your institution has a license with 3Play Media or AutomaticSync Technologies, then you can integrate that license with VoiceThread to enable one-click professional captioning. To request captions from your third party provider, use the steps above to add a caption, and choose “Order captions” next to your provider’s name.
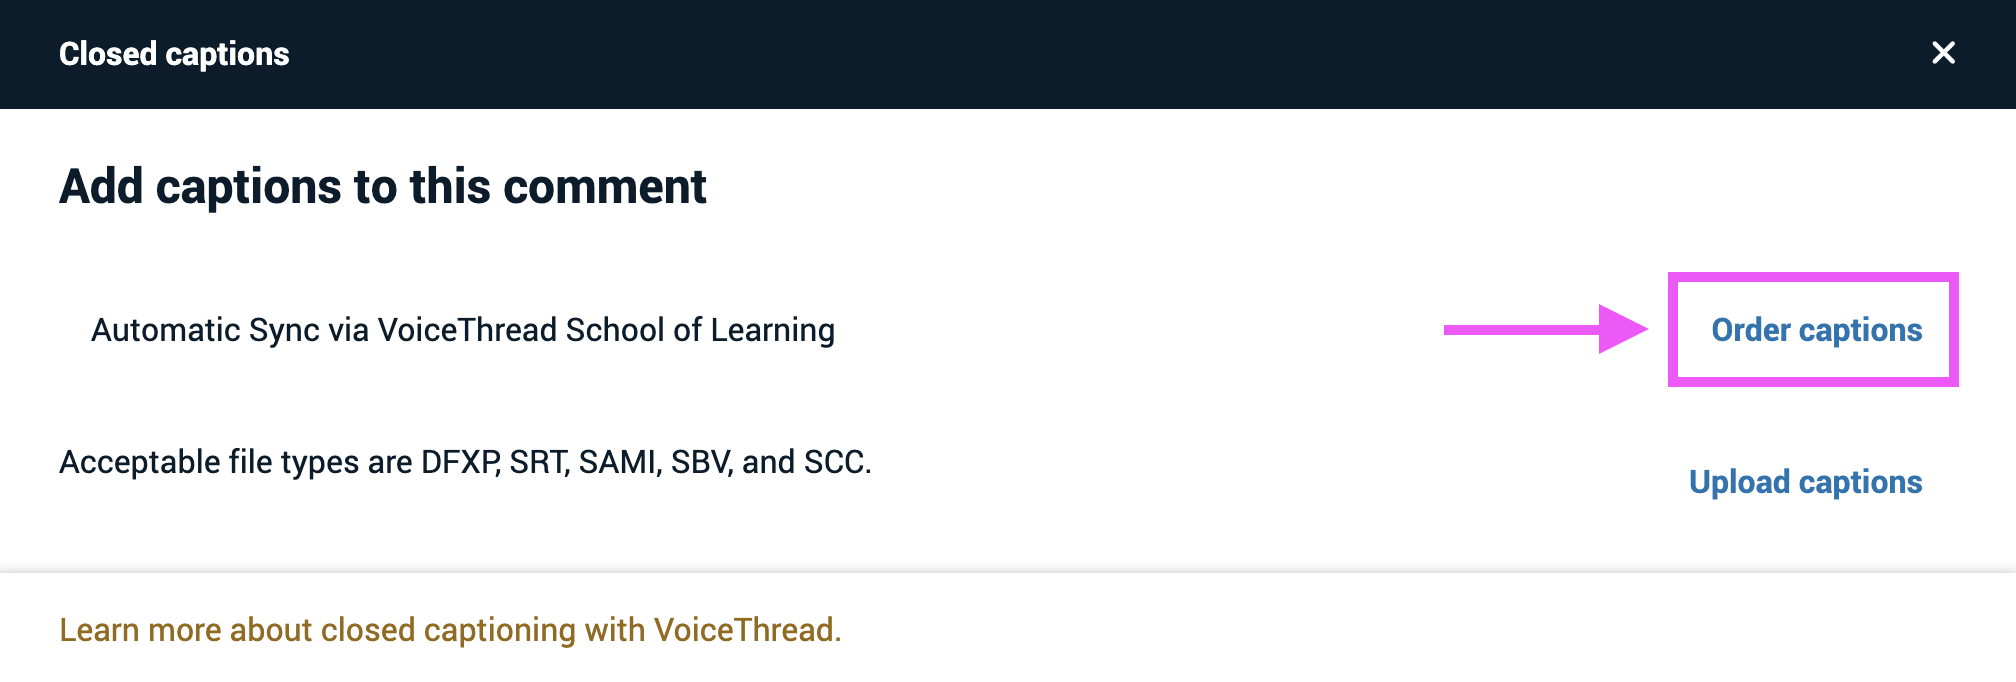
Your slide or comment will be captioned automatically as soon as your caption provider completes the request.
Automatic VoiceThread Captioning
If your institution has purchased Platinum Service, then every audio or video recording you create in VoiceThread will be captioned automatically. You don’t need to do anything at all to initiate the process. As soon as you save your recording, the captioning process will begin. Captions should appear in 5 to 10 minutes, depending on the length of your recording.
Note that the automatic captions use machine captioning technology, so there may be minor errors. Scroll down to see how to edit captions.
Contact us if you would like to upgrade in order to have access to automatic captioning.
Editing captions
Once a caption has been added to a slide or comment in VoiceThread, you can always edit it to make changes or correct any mistakes.
- Open the caption window for a slide or comment using the steps above.
- Click on the “Captions” button beneath the media preview, and select “Edit captions.”
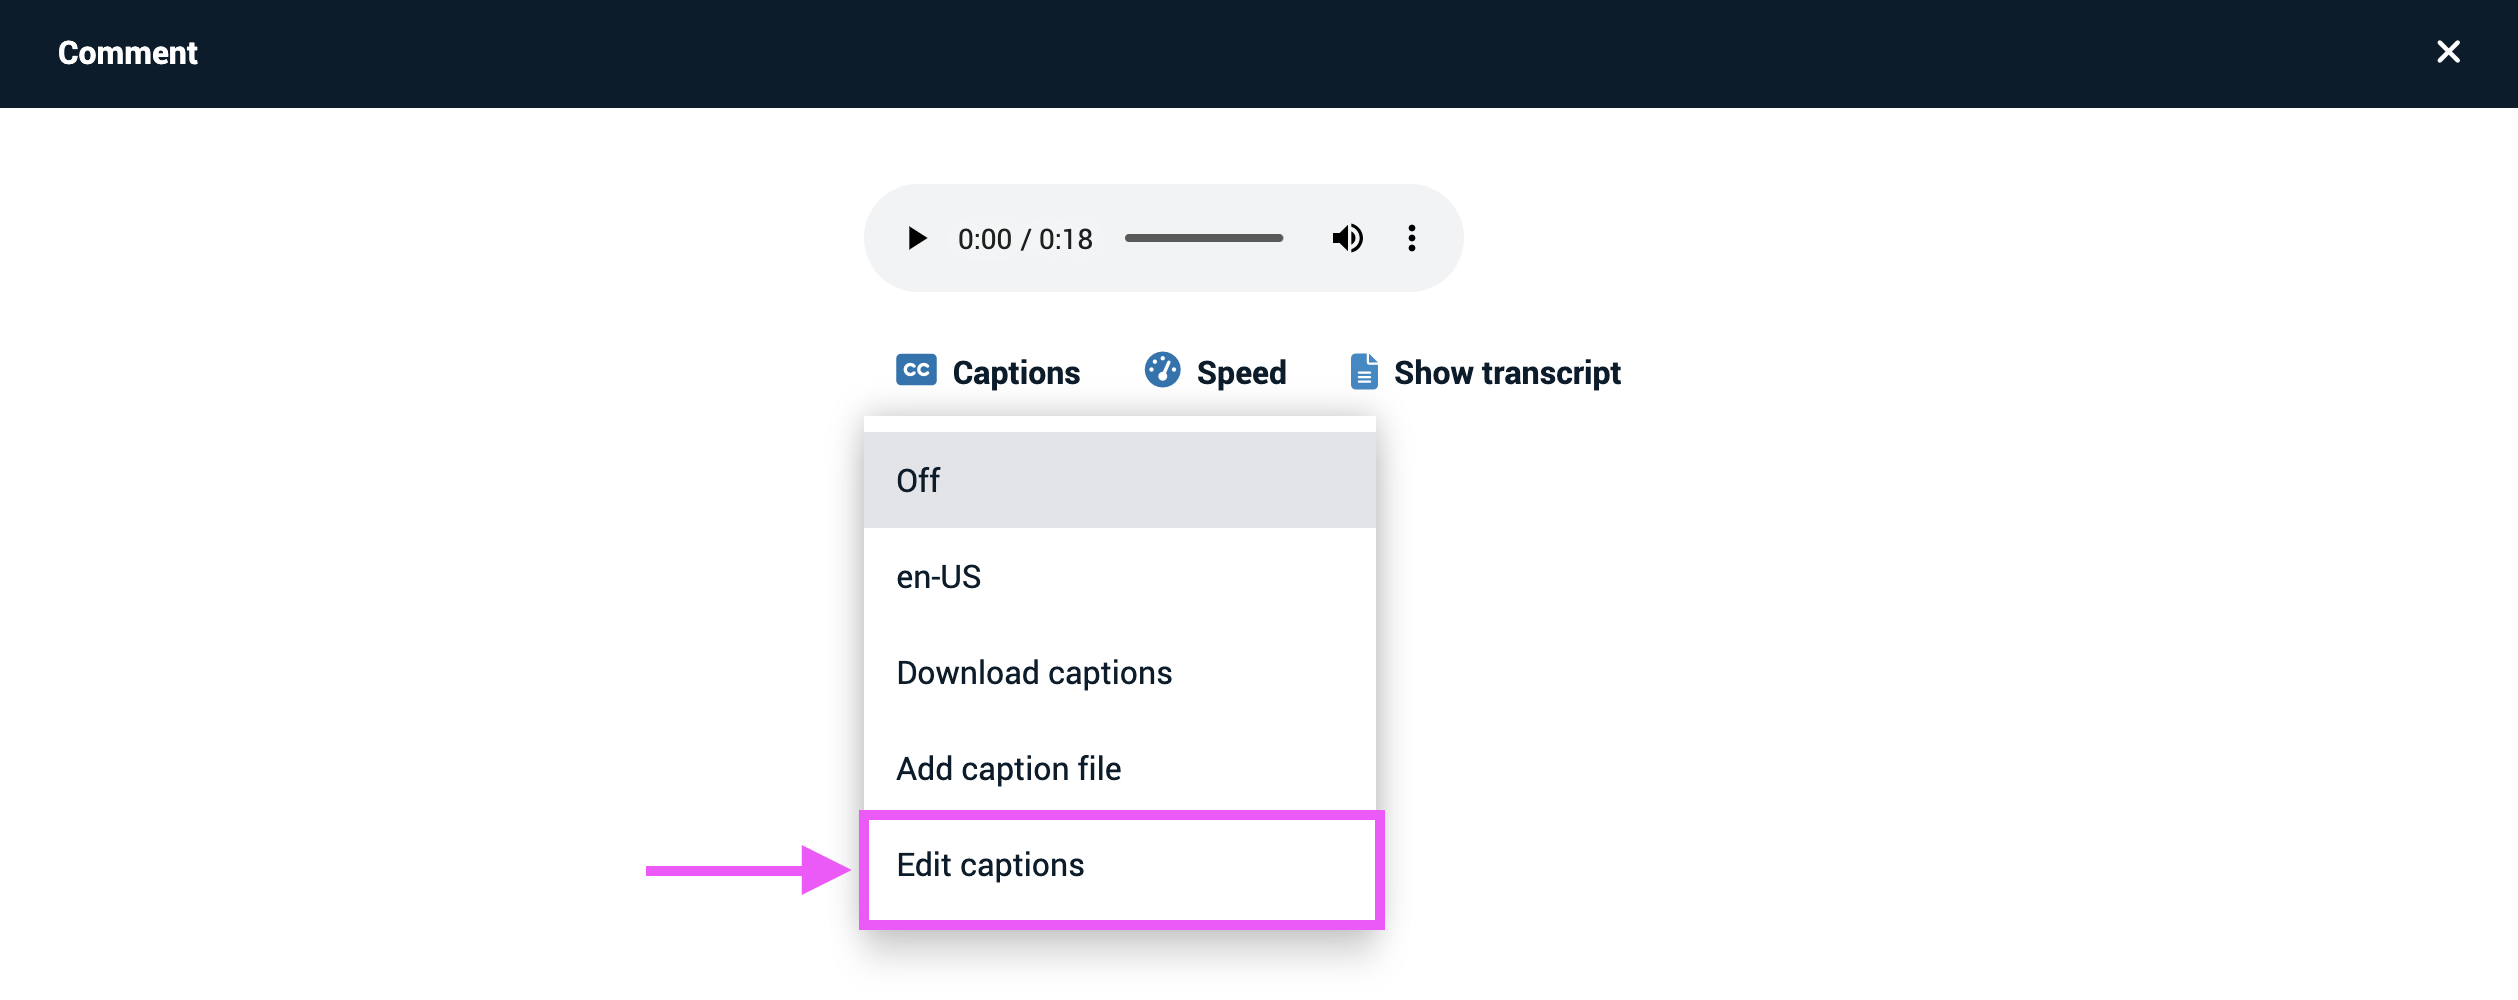
- Make any changes using the text chunks on the right.
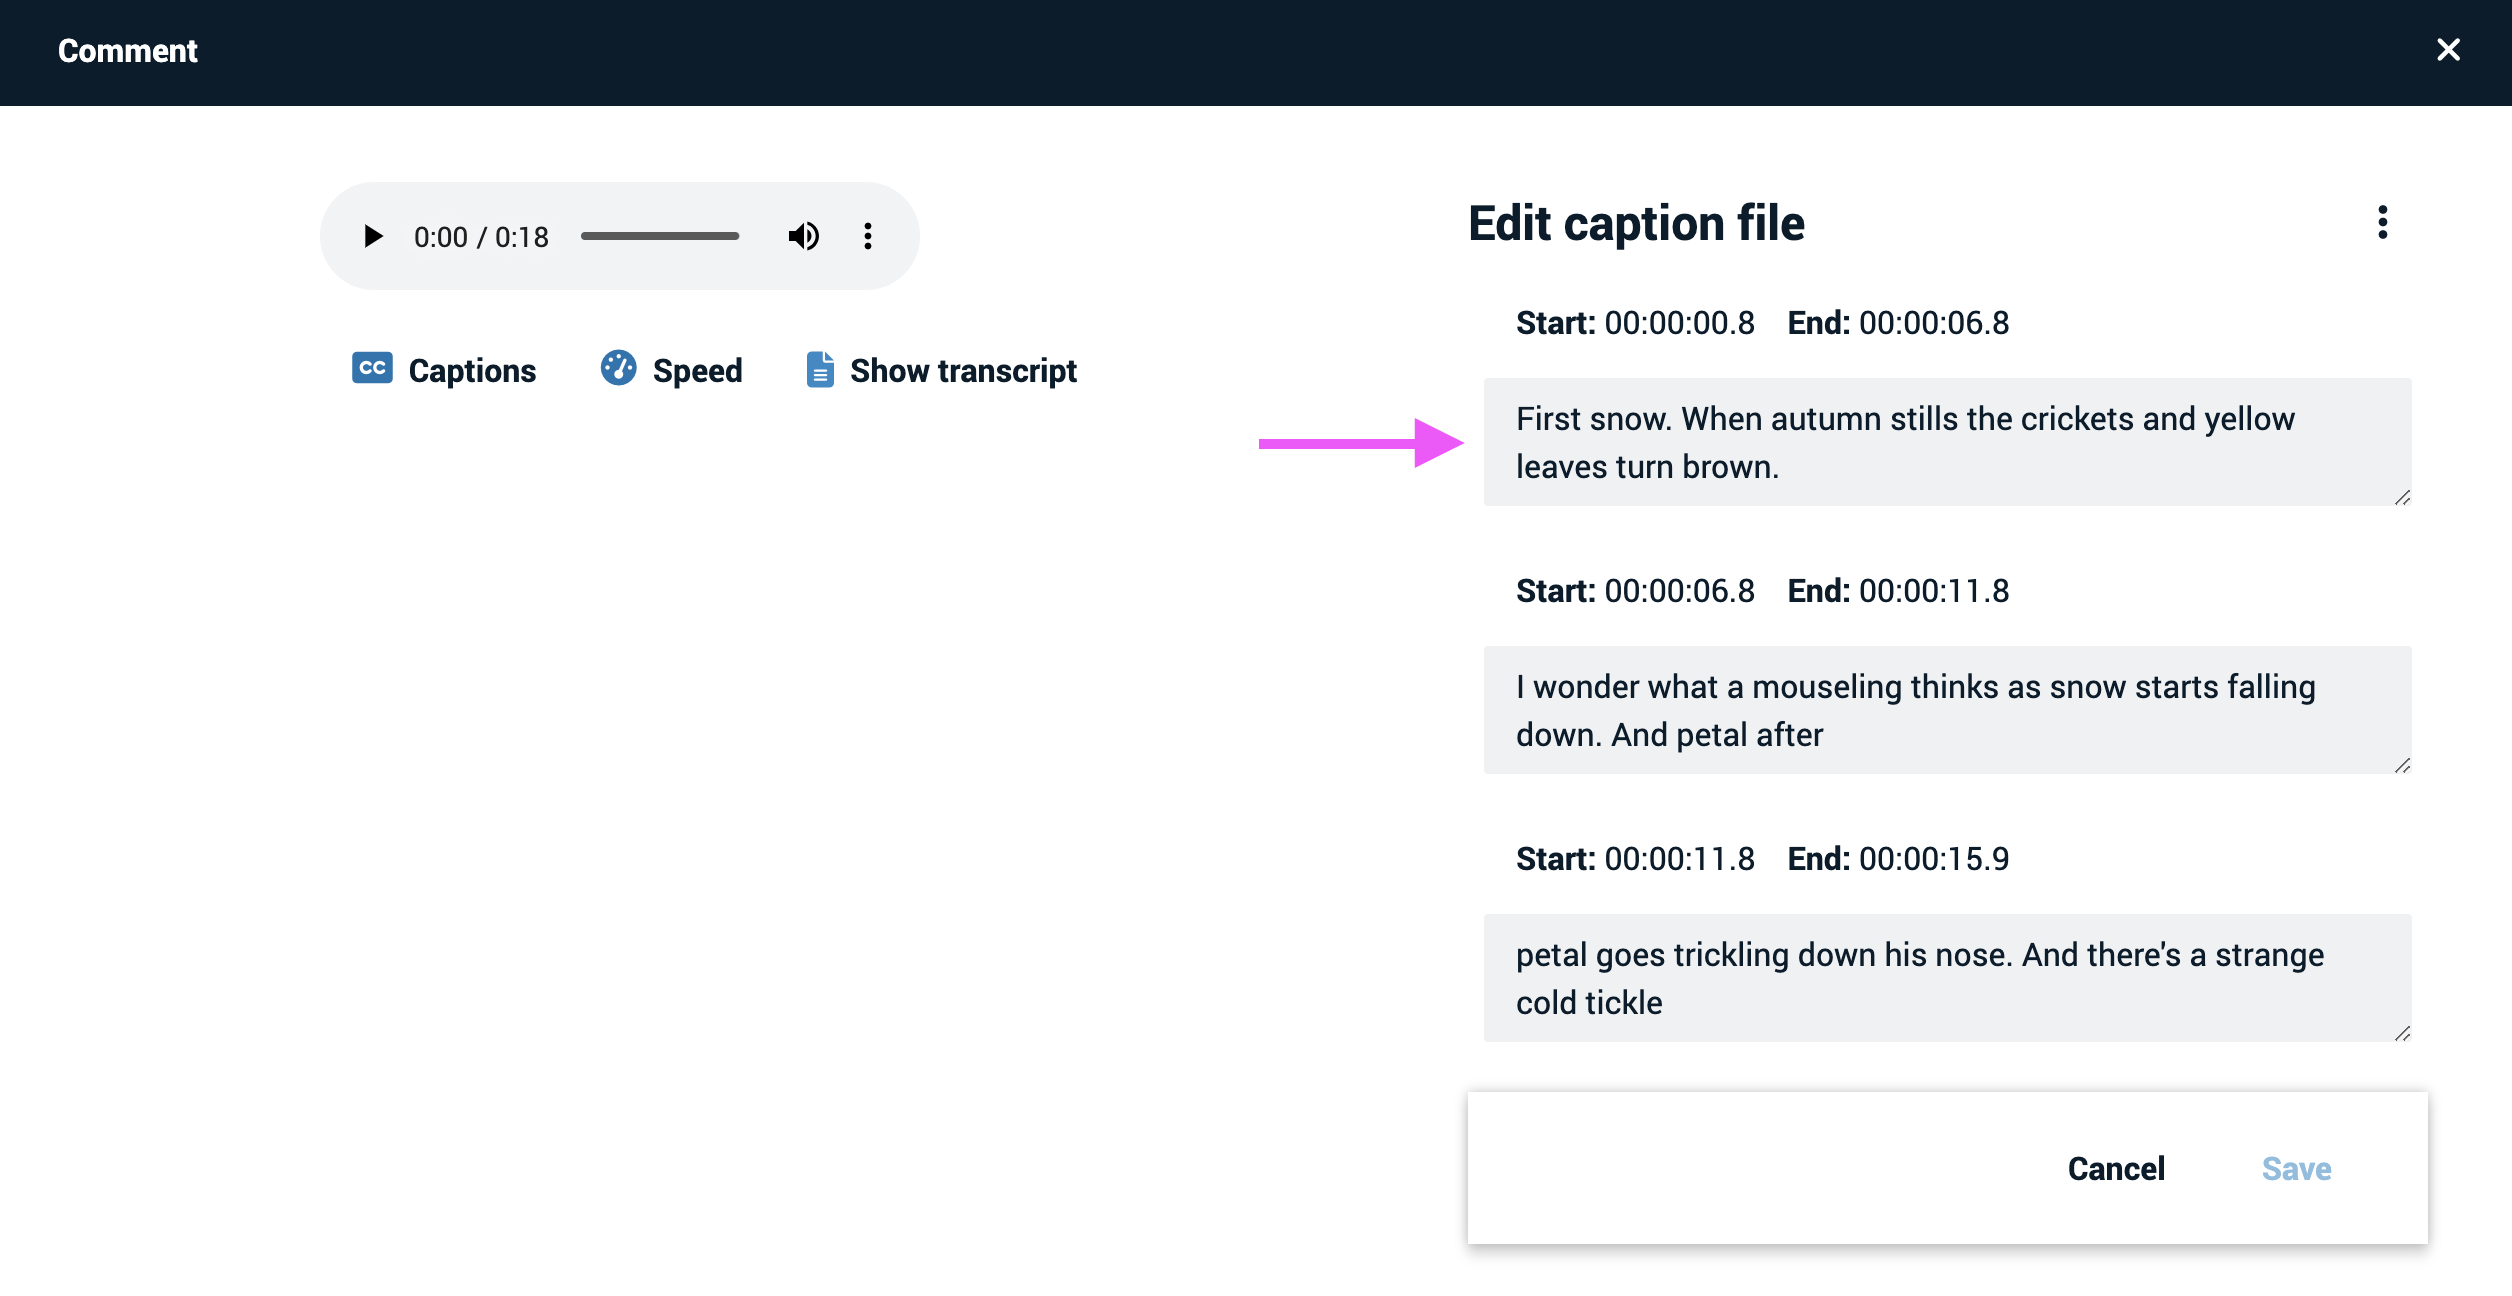
- Save.
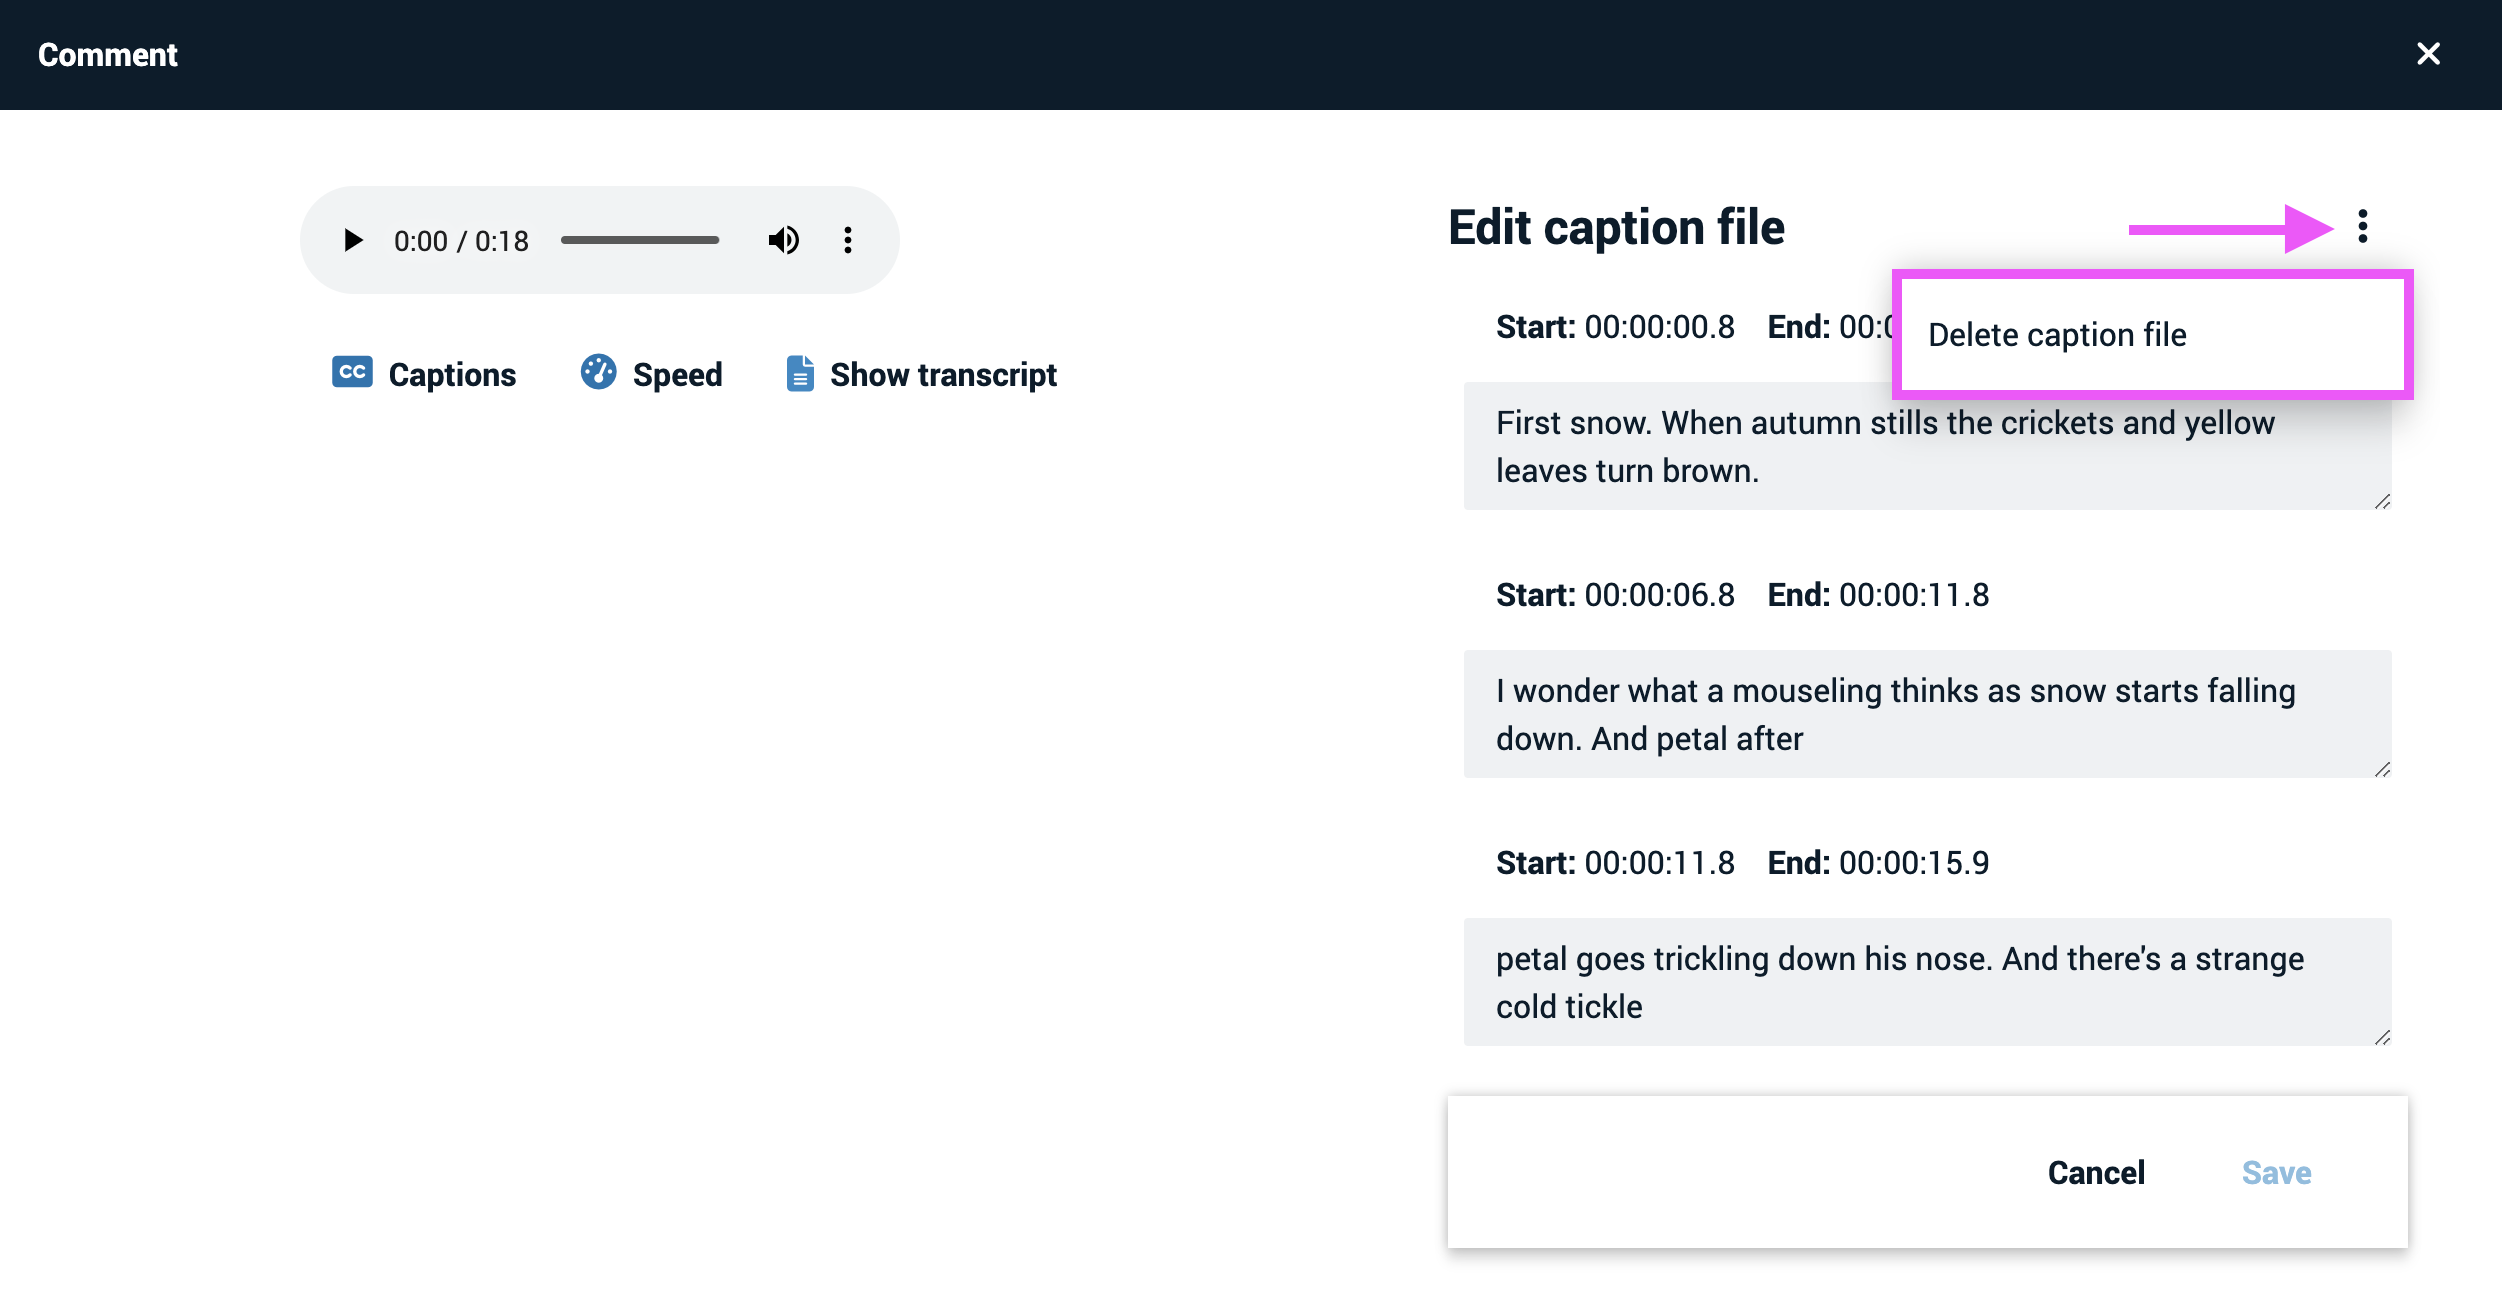
If you want to delete a caption file altogether, click on the menu icon in the top-right corner, and select “Delete caption file.”
Legacy VT
- Viewing captions in VoiceThread
- How to add a caption to a slide or comment
- Professional caption integration
- Automatic VoiceThread Captioning
- Editing captions
Viewing captions in VoiceThread
If you’re viewing the slide from the standard VoiceThread site, turn on closed captioning by clicking on the “CC” button in the top-right corner of the VoiceThread, and selecting “On”. Any slide or comment that has been captioned will display those captions as long as this option is on.
How to add a caption to VoiceThread
Only the person who created a VoiceThread or someone who has editing rights for that VoiceThread may add captions. Get started by accessing the caption dialog for your slide or comment.
For central media slides:
- Navigate to the slide that contains the video.
- Hover your mouse over the video icon on the left side of the page.
- Click on the CC button in the top-right corner of the VoiceThread.
- Click “Add captions”.
- Select your caption file.
- Click “OK”.
For comments:
- Start playing the comment.
- Click on the CC button at the bottom of the comment.
- Select your caption file.
- Click “OK”.
This will open the caption dialog box, where you can upload or request your caption. If you are uploading a file manually, just click on “Upload Captions” on this dialog and upload your file.
VT Home Page
Integrated assignments and VT Universal
VoiceThread accepts caption files in these formats:
- DFXP
- SRT
- SAMI
- SCC
- SBV
Free machine captions
VoiceThread currently offers machine-generated captions at no cost. To use this, select the language spoken in the recording and click on the “Order” button next to the option for “Machine Captions from VoiceThread”.
There is a 4-day turnaround time, and you will receive an email notification as soon as the caption is ready to be viewed. This option will be guaranteed free through December 31, 2024, and we will evaluate whether we can keep it free at that time.
VT Home Page
Integrated assignments and VT Universal
Professional caption integration
If your institution has a license with 3Play Media or AutomaticSync Technologies, then you can integrate that license with VoiceThread to enable one-click professional captioning. If this option is available to you, then that option will appear in the “Caption services” menu. Select the priority level and language from the menus below (if available), and then click on the “Order” button. Your slide or comment will be captioned automatically as soon as your caption provider completes the request.
VT Home Page
Integrated assignments and VT Universal
Note that wait times may vary from several hours to several days depending on the service. While the caption file is processing, you’ll see a clock icon next to the caption service in this interface. Once the caption is complete, you’ll see a check mark instead. You will also receive an email notification from VoiceThread once the caption is available to view.
Learn more about setting up a closed caption integration here.
Automatic VoiceThread Captioning
If your institution has the Platinum Service Tier, then every audio or video recording you create in VoiceThread will be captioned automatically. You don’t need to do anything at all to initiate the process. As soon as you save your recording, the captioning process will begin. Captions should appear in 5 to 10 minutes, depending on the length of your recording.
- Note: Don’t forget to turn captions on in the top-right corner in order to see them.
To make edits to the automatic captions after they are completed, please see “Editing Captions” below.
Contact us if you are not sure whether your institution has Automatic VoiceThread Captioning.
Editing captions
Once a caption has been added to a slide or comment in VoiceThread, you can always edit it to make changes or correct any mistakes. To begin, follow the steps above to open the Closed Caption window, and then click on “Edit captions”.
VT Home Page
Integrated assignments and VT Universal
This will open the caption editor, where you can make manual changes to the text. Make sure you save before closing the editor, and those changes will be visible in the VoiceThread instantly.
VT Home Page
Integrated assignments and VT Universal